How to Replace a Zipper Slider: Patagonia's Own Repair Guidance, Zipper Types, and Where the Brand Says to Stop
A stuck or separating zipper doesn't have to retire a jacket. Patagonia's care-and-repair guide walks through identifying the zipper type, gathering supplies, replacing a slider, and — importantly — where the brand says a DIY fix ends and professional repair begins. Here's what that guidance covers, in the brand's own words.
Watch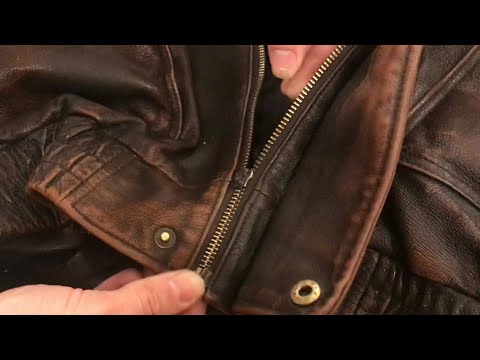 fixing a ZIPPER in “seconds” (with pliers)
The recording belongs to Live Free, not to this publication, and it plays from YouTube: opening it lets YouTube see the request.Watch on YouTube instead.
Contents
A busted zipper on a favorite jacket feels like the end of the garment, but it often isn't. Patagonia's care-and-repair guide argues that zipper repair is simpler than most people assume, and that one of the brand's most common zipper issues is the slider, the small piece that moves up and down the chain and does the actual zipping — a part you can swap at home. The brand's advice is aimed at its own gear, and the brand notes that a lot of its products have zippers, from jackets to waders and beyond.
The first step, before any repair, is figuring out what kind of zipper you're dealing with, because the fix depends on it. Patagonia distinguishes two main types and warns that they use different parts.
First, identify the zipper type
The brand's guide is emphatic that this identification step matters. There are two families of zipper to sort between:
- Coil zippers, described by Patagonia as "a continuous spiral of nylon or polyester sewn onto the tape, making them flexible and suitable for curves"
- Plastic-tooth or metal-tooth zippers, which have "individual molded teeth, making them stiffer"
- The two types "use different parts and require unique approaches to repair," which is why the brand says "the first thing you need to know is what type of zipper you're working with"
- For a fuller breakdown, the guide points readers to iFixit's zipper identification guide, and notes that "Patagonia gear repair is available if a DIY fix isn't possible"
Gather the right parts
Zipper repair, as Patagonia describes it, often involves replacing a specific part rather than the whole zipper. The brand lists a short set of supplies: micro shears, needle-nose pliers, a slider ("the part that does the zipping"), and a zipper stop ("the part that keeps the slider from falling off the chain"). Which slider and stop you need depends on whether the zipper is coil or plastic-tooth — they are not interchangeable.
If a part is hard to find, the brand suggests a few routes. You can bring the garment to a Patagonia store, where staff can hand over supplies, make minor fixes on-site, or walk you through the fix; if you're not near a store, the guide says you can call customer service to have sliders and zipper stops sent to you.
When the slider is the problem — and when it isn't
Patagonia identifies a failing slider as "one of the most common issues" and points readers to its slider-replacement steps in that case. But the guide is equally clear that not every zipper problem is a slider problem, and some damage shouldn't be fixed at home: "If the zipper teeth are damaged and won’t come together, or if the damage is more significant, professional repair and/or replacement might be the best choice." In the brand's framing, the DIY route ends at the teeth — if the teeth themselves are broken, it's a job for a repair service, not pliers and a new slider.
The no-lubrication rule
The advice many DIY videos contradict concerns jammed zippers, which Patagonia says are "usually caused by fabric caught in the slider." The brand's rules are deliberately conservative: don't force the zipper, and don't reach for lubricant — the brand explicitly tells readers to "ignore those 'How to Get a Zipper Unstuck' DIY videos that suggest lubrication." The same prohibition applies to zippers that merely feel rough. If a zipper isn't sliding smoothly, the brand says to brush out dirt or debris gently, and notes that "washing and general cleaning are better" than any lubrication. In the brand's view, a clean, undamaged zipper needs no help: "If it’s clean and undamaged, a zipper should function properly on its own." If fabric is genuinely stuck, the advice is to work the stuck fabric free while moving the slider gently, using pliers only with care.
Where the brand says to stop
For extensive damage, Patagonia's advice is explicit: bring the item to one of its stores for advice, send it to the company's repair center, or take it to a local garment repair shop. That's the boundary the guide draws — slider swaps and gentle cleaning at home, hands off when the teeth are damaged or the problem is bigger than one part.
A note on scope: this is Patagonia's guidance for its own products, published in the brand's care-and-repair guides, and store services or the mail-in repair process are as the brand describes them — details such as locations and turnaround can change, so confirm on the brand's site before relying on them.
To check the result yourself: as a simple general sanity check after a slider swap (not steps the brand specifies), zip and unzip the full length of the zipper to confirm the teeth engage and the new stop holds the slider on the chain. Before you start, reread the brand's own guide (dated June 22, 2026, on patagonia.com) to match its current steps, and if the teeth don't come together cleanly, that's the signal the brand gives to stop and seek professional repair instead of forcing it.
From the source
Written from the pages listed above and checked by the editors. Spotted a mistake? Write to us: corrections keep the address and the first publication date.
Read next
More in CareDark Denim Dye Transfer: What Levi's Says Causes It, How to Prevent It, and Why the Brand Says No Refunds Are Offered
Dark-wash, black and raw denim can leave blue marks on lighter fabrics and surfaces. According to Levi's help-center guidance, dye transfer is a normal characteristic of heavily dyed denim rather than a defect, and the brand says it does not offer refunds or replacements for it. Here is what the brand advises: washing jeans before the first wear, cold-water washes inside out, dark-only loads, air drying, and prompt cleaning if a mark appears.
How to Restore Durable Water Repellent (DWR) on a Waterproof Jacket: Gore's Official Steps, and What DWR Does Not Do
When a waterproof jacket stops shedding rain, the problem is usually not the membrane but a worn-out durable water repellent (DWR) — the thin coating on the outer fabric. This explainer walks through Gore's own care sequence for GORE-TEX outerwear: washing warm with liquid detergent, reactivating the factory DWR with heat, and re-applying a spray-on or wash-in treatment when beading fails — plus the SHAKEDRY exception and why a tired DWR does not make a jacket leak.
Care·Brand program··4 min
Nudie Jeans Free Repair Program: Who Qualifies, Where You Can Go, and the Limits — According to the Brand's Own Help Center
Nudie Jeans says it will repair its jeans for free, as many times as needed, no matter when or where they were bought — but only its own jeans, only freshly washed, and in person at brand shops and partners, with a repair-kit workaround for c/o members. Here is what the brand's help center says about eligibility, kits, trade-ins and the no-mail-in rule.